SD-WAN Lab
Part of old BLOG post we learned SD-WAN components and their Roles.
This Blog we going to Configure the SD-WAN Lab from Scratch and Verification.
Note : Some of the Installation of CA on Windows 2019 and CA/DNS/DHCP (not part of this scope) – you may find enough documents online how that can be achieved.
I have used below components to test :
- Viptela 20.7.1: vManager, vBond, vSmart, vEdge,
- CSRv1000: csr1000vng-ucmk9.16.12.4a-sdwan
- ISRv – isrv-ucmk9.16.12.5-sdwan
- ISP and MPLS Router: IOL i86bi_LinuxL3-AdvEnterpriseK9-M_15.4.2-2T.bin
- Switches – IOL SSA-iron-2019.bin
- DNS/CA/Management Server, Windows 2019 x64
before we start configuring – SD-WAN planning very important also Certs for device communication each other in secure way.
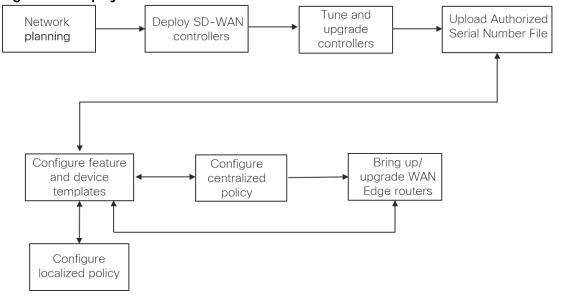
Network planning – Plan out number of devices per Branches, system IP addresses, and site IDs; plan WAN Edge device configurations, policies, Check any firewall ports that must be open to accommodate WAN Edge communication.
Below Network Planning Information :
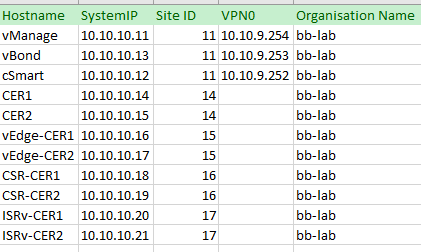
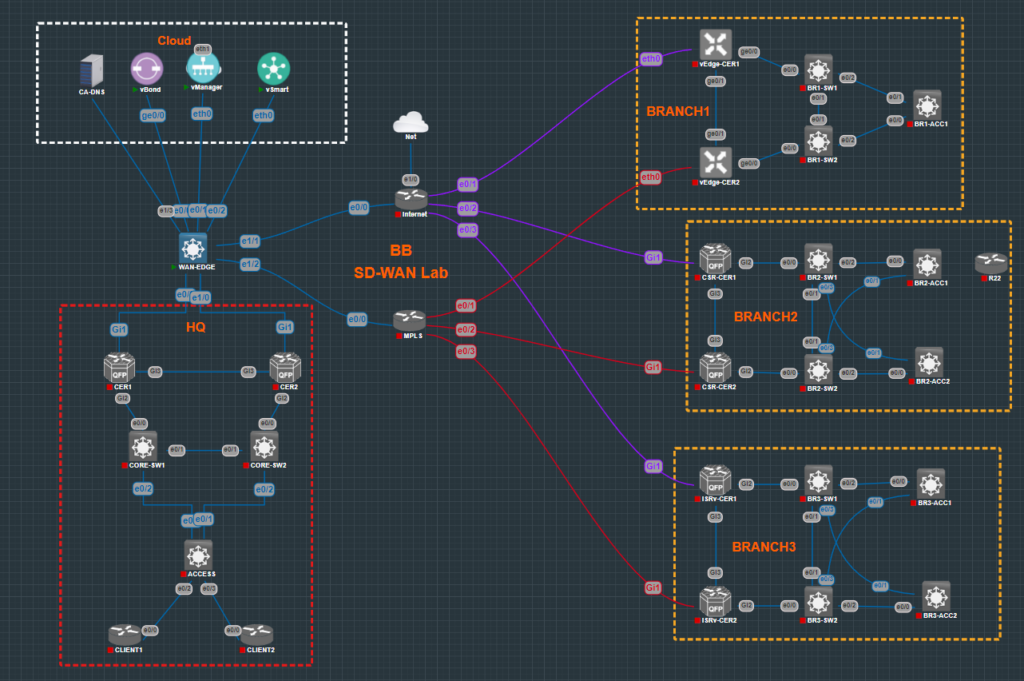
High level network Lab diagram:
Below attached config – WAN-EDGE. MPLS, Internet
Configuring vManage and installing the Certs from CA.
- Boot up the vManage
- Take time to Install and you get login prompt ( Default admin/admin works) – you can change the password initial Setup
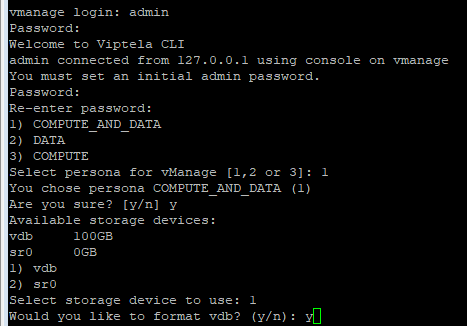
- You are prompted to choose a persona for a Cisco SD-WAN Manager server the first time that the server boots up after Cisco SD-WAN Manager is installed. The prompt appears in the command line as follows:
- 1) COMPUTE_AND_DATA
- 2) DATA
- 3) COMPUTE
- Select persona for vManage (1, 2 or 3): 1
- Then select Available storage (it required 100GB) and type Y to proceed.
- Once it boots up and wait for system ready message appears on the screen before you login (if not it will warn you username and password not correct).
- Once system ready – login using admin/newpassword.
- Basic Configuration vManage as below :
Note : organisation-name should match all components to work as expected – if you have control connection issue check “organisation-name“
config

system
host-name vManage
system-ip 10.10.10.11
site-id 11
sp-organization-name  bb-lab   # This one you only see in VManage
organization-name bb-lab
vbond vbond.bb.local
!

!
vpn 0
interface eth0
ip address 10.10.9.254/24
tunnel-interface
allow-service all
allow-service netconf
allow-service sshd
no shut

ip route 0.0.0.0/0 10.10.9.1

interface eth1
ip address 192.168.1.154/24   # This is My LAN IP to use GUI vManage
no shut
ip route 192.168.1.0/24 192.168.1.254  # Route to my Lan
!
commit and-quit
reboot

Once the device come online - check eth0 and eth1 able to ping from respected network segement.


You can access Vmanage https://192.168.1.154:8443
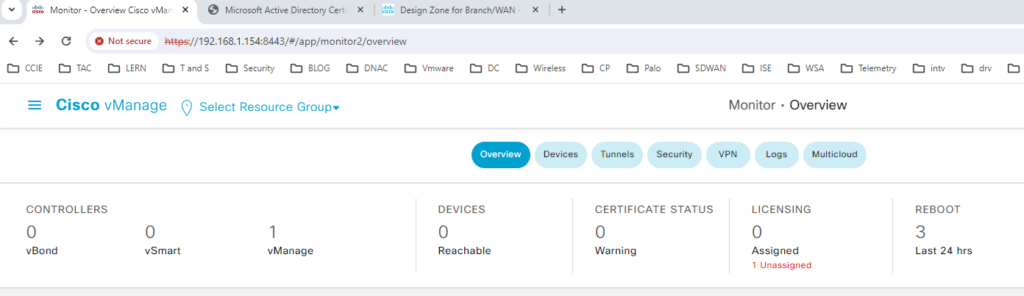
Configure organization name & vBond Address
- Log into the vManage from the Server by browsing to https://192.168.1.154:8443 using a username of admin and a password of admin.
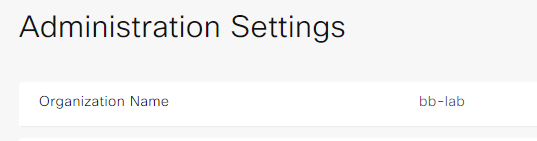
- Navigate to Administration -> Settings
- Click Edit on the Organization name and set it to bb-lab. Confirm the Organization name. Click OK.
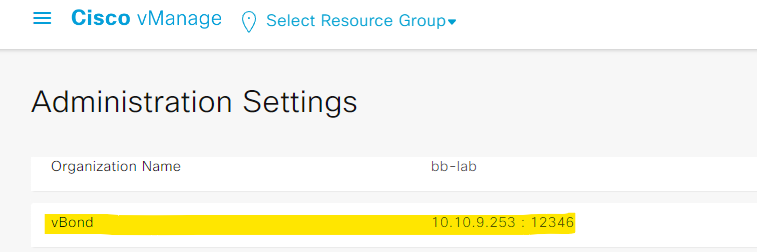
- Click Edit on the vBond address and change it to vbond.bb.local(make sure DNS working, if not use IP address 10.10.9.253). Confirm and click OK.
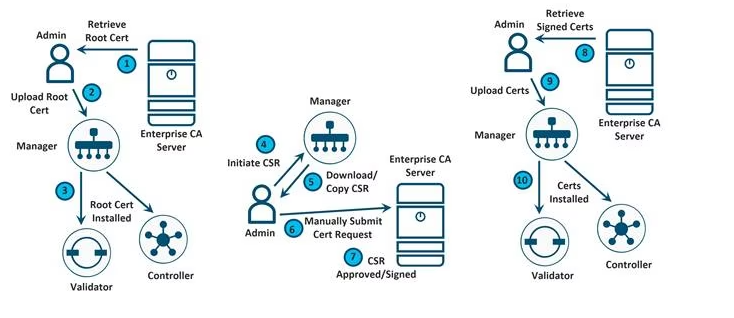
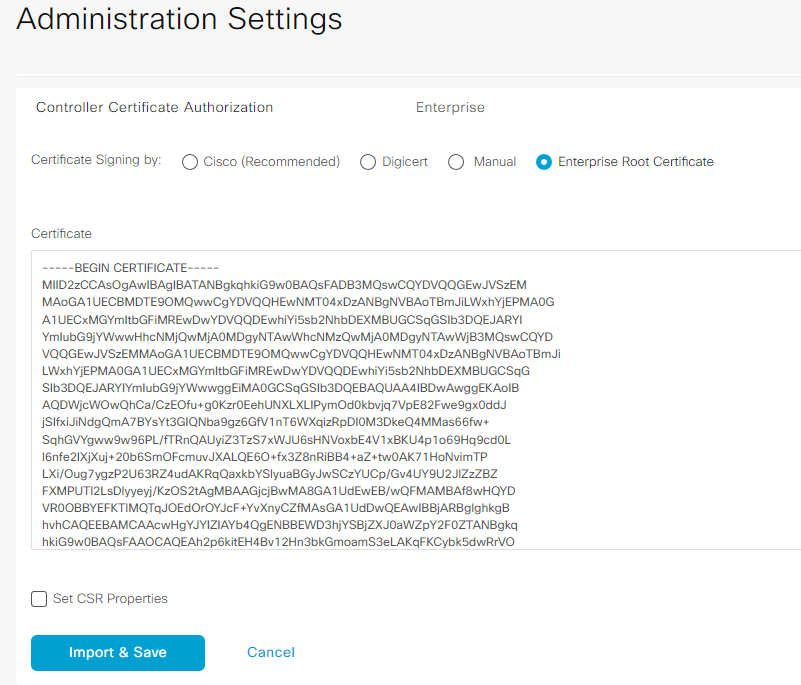
Install root Certificate on vManage (i have used my MS CA Server to generate root certs, you can use your comfortable – like XCA or OpenSSL).
In vManage, Navigate to Administration -> Settings -> Controller Certificate Authorization
Right side click select file, navigate to downloads folder, on the right bottom select all files
Choose “RootCert.cer”
Click Open
Click import and Save
Generate CSR for vManage node
Navigate to Configuration -> Certificates -> Controllers -> vManage -> Generate CSR. (sign with your CA)
Installing the Identity Certificate for vManage
In vManage, Navigate to Configuration -> Certificates -> Controllers
Select vManage and Click on the “Install” button at the top right corner
Click on right upper corner select “Select file”.
Navigate to Downloads/and select Type “All files”
Select vManage.cer certificate
Click Open
Click Install
The Identity certificate should be successfully installed on vManage.
vBond bootstrap and Cert Installation
system
host-name vBond
system-ip 10.10.10.13
site-id 11
admin-tech-on-failure
no route-consistency-check
no vrrp-advt-with-phymac
organization-name bb-lab
vbond 10.10.9.253 local # Local this is very important since this deviceacting as vBond
vpn 0
interface ge0/0
ip address 10.10.9.253/24
ipv6 dhcp-client
tunnel-interface
encapsulation ipsec
allow-service all
no shut
ip route 0.0.0.0/0 10.10.9.1
commit
reload
Add vBond to vManage
Log into the vManage from the Server by browsing to https://192.168.1.154:8443 using a username of admin and a password of admin.
Navigate to Configuration -> Devices -> Controllers -> Add Controllers -> vBond and specify the following to add the vBond in vManage.
IP Address: 10.10.9.253
Username: admin
Password: MyPassword
Check Generate CSR
Click OK
Confirm and click OK.
Download the generated CSR for vBond
Navigate to Configuration -> Certificates -> Controllers -> vBond -> View CSR.
It will open a window with the CSR. Click Download to Local Drive ( rename that to vBond.csr) – since with your CA.
Installing the Identity Certificate for vBond
In vManager, Navigate to Configuration -> Certificates -> Controllers
Select vBond and Click on the “Install” button at the top right corner
Click on right upper corner select “Select file”.
Navigate to Downloads/and select Type “All files”
Select vBond.cer certificate
Click Open
Click Install
The Identity certificate should be successfully installed on vBond.
Onboard vSmart and Install Certificate :
system
host-name vSmart
system-ip 10.10.10.12
site-id 11
organization-name bb-lab
vbond 10.10.9.253
!
!
vpn 0
interface eth0
ip address 10.10.9.252/24
tunnel-interface
allow-service all
allow-service netconf
allow-service sshd
no shut
ip route 0.0.0.0/0 10.10.9.1
!
commit and-quit
reboot
Add vSmart to vManage
Log into the vManage from the Server by browsing to https://192.168.1.154:8443 using a username of admin and a password of admin.
Navigate to Configuration -> Devices -> Controllers -> Add Controllers -> vSmart and specify the following to add the vSmart in vManage.
IP Address: 10.10.9.252
Username: admin
Password: MyPassword
Check Generate CSR
Click OK
Confirm and click OK.
Download the generated CSR for vSmart
Navigate to Configuration -> Certificates -> Controllers -> vSmart -> View CSR.
It will open a window with the CSR. Click Download to local Copy and rename to vSmart.csr and sign wth Local CA.
Installing the Identity Certificate for vSmart
In vManager, Navigate to Configuration -> Certificates -> Controllers
Select vSmart and Click on the “Install” button at the top right corner
Click on right upper corner select “Select file”.
Navigate to Downloads/and select Type “All files”
Select vSmart.cer certificate
Click Open
Click Install
The Identity certificate should be successfully installed on vSmart.
You will see as below success – if all Synched correctly :

Resync root certificate with browser :

Now we now completed Controller – Next Blog we will continue onboarding EDGE device PART2…!
Happy Labbingggggggggggggggg..!