vFTD 7.0 Install and Configure using Local(FDM)
Simple Lab testing FTD with FDM (been using FMC to manage many boxes, but now like to test what New FDM 7.X features can work)
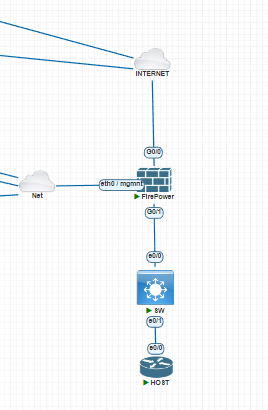
Internet – IP coming from DSL Router ( 192.168.1.240)
Have management network 10.10.9.0/24 – FTD MGMT IP 10.10.9.240
LAN network 192.168.200.0/24 ( FTD Inside IP – 192.168.200.1)
Switch IP 192.168.200.254, Host Acting as Web Server 192.168.200.2 (port HTTP-80 running)
Installation – Get the Qcows file from the Cisco site, and upload it to PNET Lab.
Start the Node – and open a Console (that will be VNC)
Be Patient it will take 15-20min to come up – you will not see any more messages about what is going on.
After 20min you get prompt Login : (admin/Admin123 – Default username/password)
Press <ENTER> to display the EULA : (ENTER and Accept with yes for License)
it will ask you for a new password – remember, if you lost you need to reset the password procedure.
- Do you want to configure IPv4? (y/n): y
- Do you want to configure IPv6? (y/n): n
- Configure IPv4 via DHCP or manually? (dhcp/manual) [manual]: Press ENTER to Manual
- Enter an IPv4 address for the management interface [192.168.45.45]: 10.10.9.240
- Enter the IPv4 default gateway for the management interface [192.168.45.1]: 10.10.9.1
- Enter a fully qualified hostname for this system [firepower]: FTD7
- Enter a comma-separated list of DNS servers or “none” [208.67.222.222,208.67.220.200]:
- Enter a comma-separated list of search domains or “none” []: bb.local
Once that is completed – you like to manage using FDM(that is local)
Manage the device locally> (yes/no) [yes]: yes
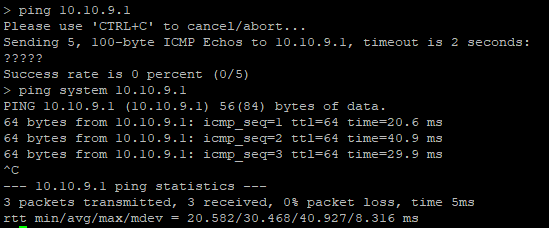
Testing Management Gateway (always use the system to ping management/diagnosis interface)
ping system 10.10.9.1
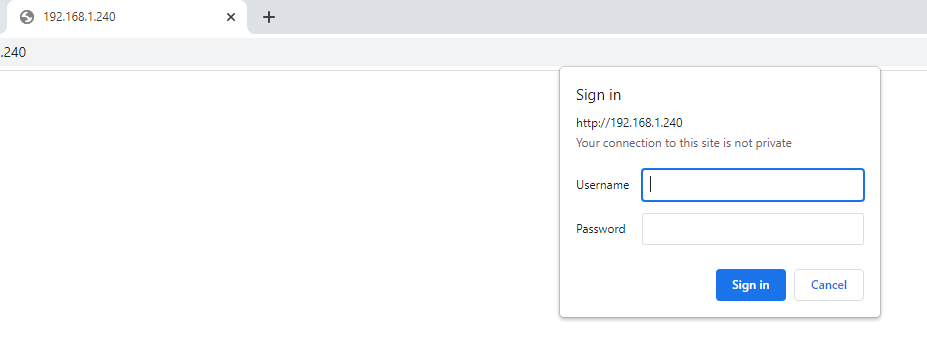
From the Management jump box try accessing FTD GUI :
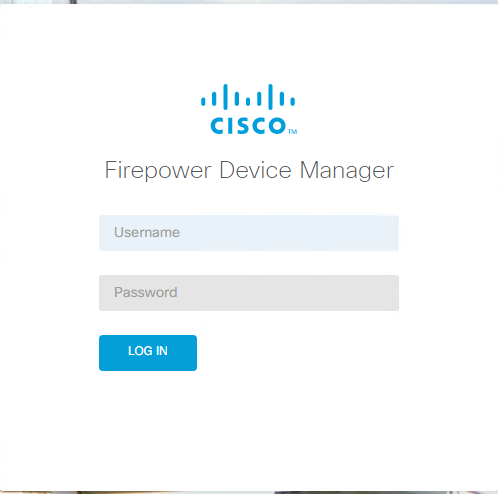
Use Admin/Newpassword.
Follow basic config – Outside and Inside (using a 90days License – you will not able to test Remote Access VPN with this).
By Default NAT rule is available from the inside of the network to outside, also FTD has a DHCP config, if you connect a PC (if you do not change anything you will get a 192.168.45.X/24 IP address for the clients connected in the LAN.
By Default – Source address any, for security reasons – I have changed to LAN address 192.168.200.0/24)

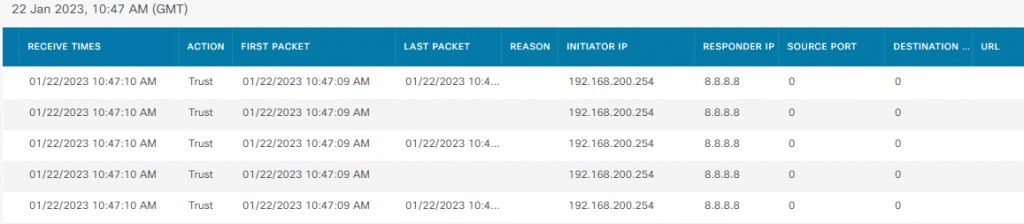
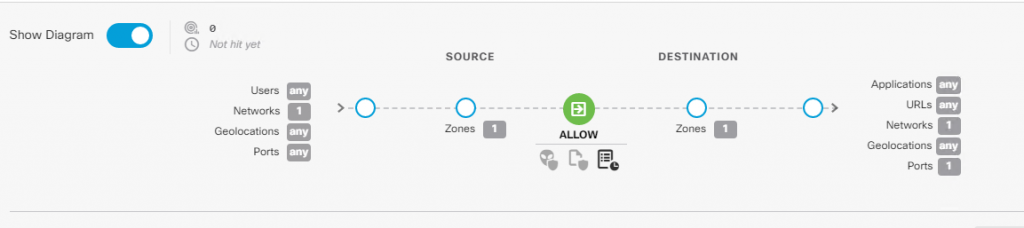
you can also see flow :
Time to test from client :

You can check Logs in the GUI: Monitor –> Events
Now I would like to have incoming connection to My host running WebServer
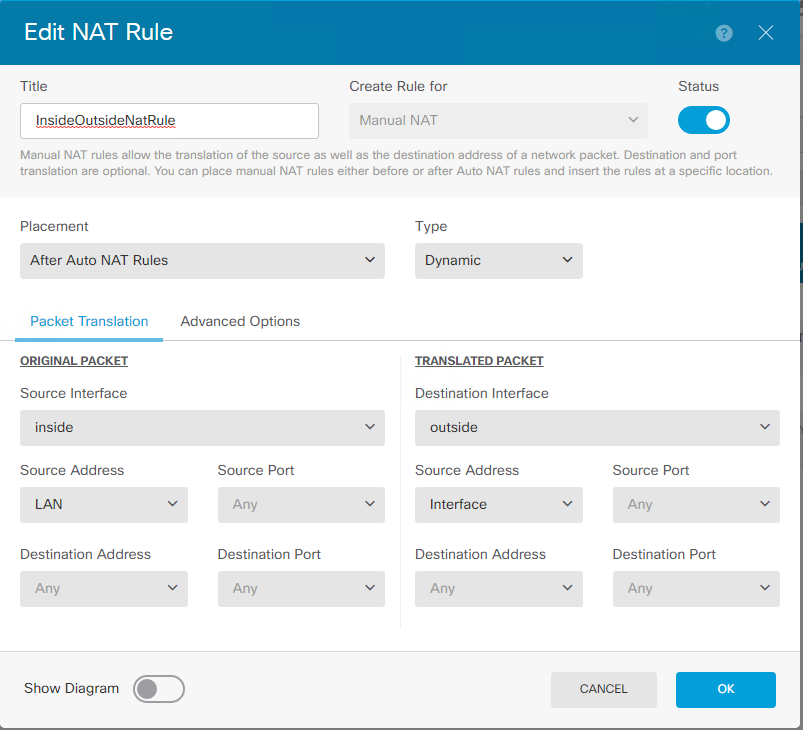
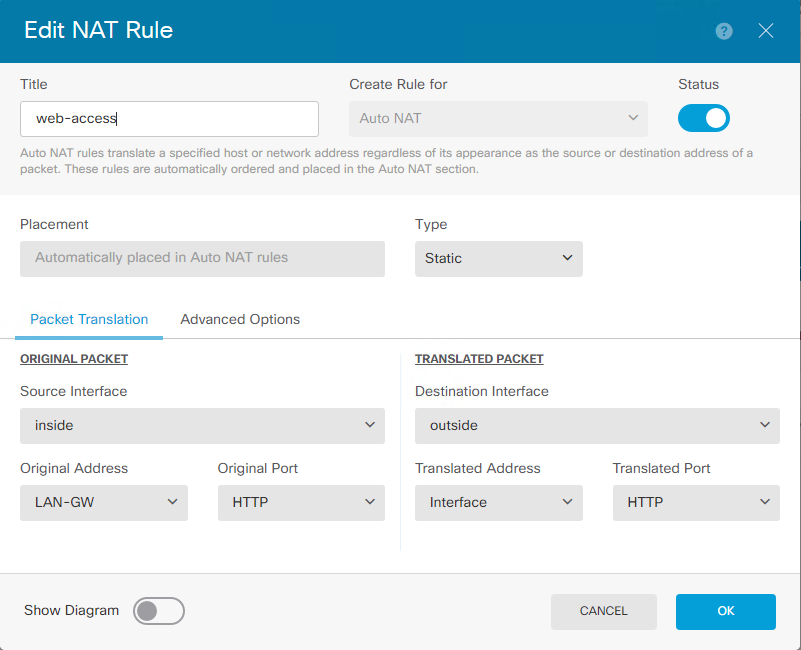
If you do not have any Public IP address spare and you like to use DSL WAN IP address, then you need to use AutoNAT (static NAT not worked for me)
Web Server – 192.168.200.254 (router running HTTP Service)
FTD Outside IP address 192.168.1.240
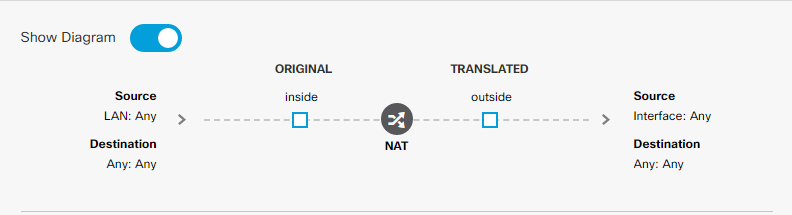
NAT Rule :

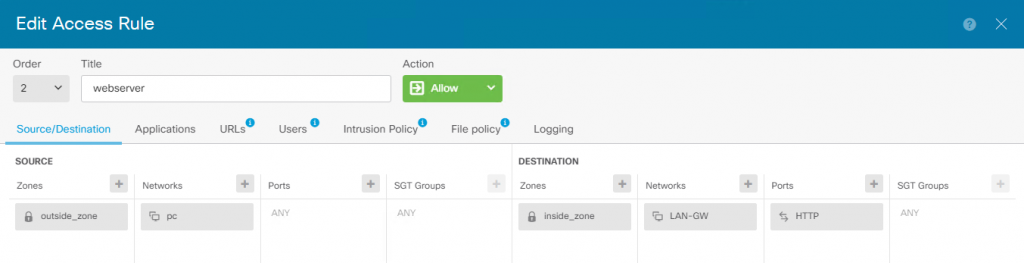
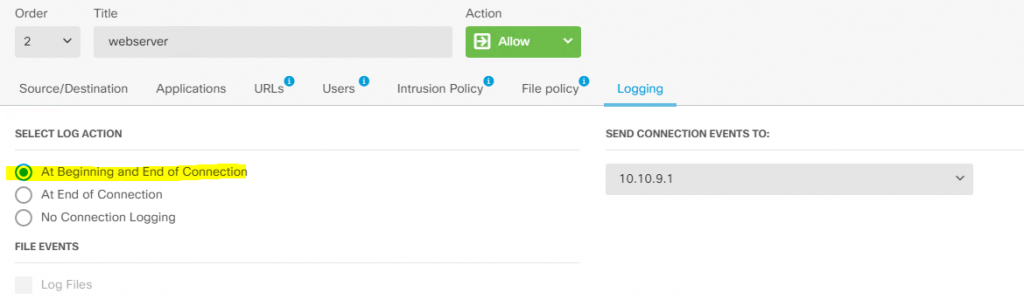
Access Policy :

use the below icon to deploy the changes :

You can view the deployment changes as below :

Now time to test incoming connections from outside to reach Web Server
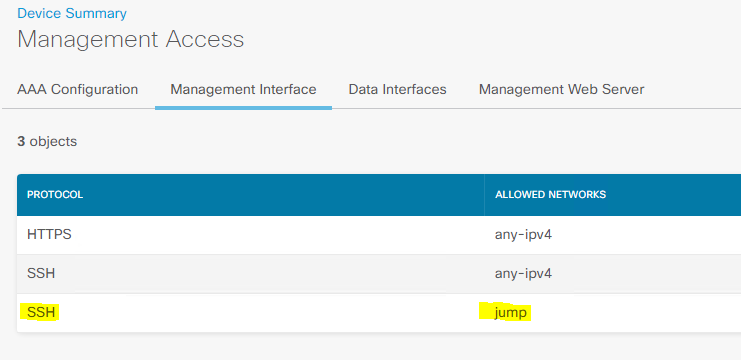
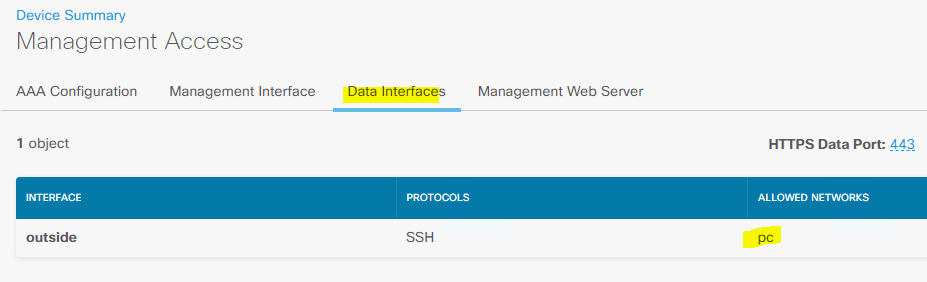
There is an issue with SSH – by default SSH not enable, not seen in the FDM to enable.
I have configured it as below to access the Outside and diagnosis interface for SSH coming in.
outside :
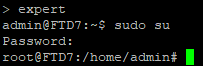
edit /etc/ssh/ssd_config
vi /etc/ssh/sshd_config ( I am using vi editor)
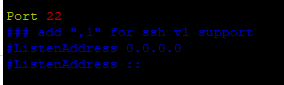
Remove #Port 22 (so look as below)
Restart SSHD daemon :

Now we should able to SSH to FTD
FDM has limited capabilities unlike FMC (but for home users FDM is a must – since they can not pay more money for FMC or VM) – Cisco needs to look at and add more features like FMC to FDM – Wish list.
There is a big feature missing, you can not roll-back the last known good config.
Happy Labbingggggggggggggggggggggggggggg!