Installing Cisco ISE 3.0 in VMware ESXi
The Cisco Identity Service Engine (ISE) is Identity Management and access policy solution similar to the Cisco Secure Access Control Server (ACS). So why does Cisco have two of these solutions? Well, the Cisco ISE is long live and moving next level of Identity and ACS 5.8 will be EOL (no Longer supported)
The Cisco ISE is available both as hardware and also as a virtual appliance
ISE 3.0 Key features :
AAA protocols: Cisco ISE uses RADIUS protocol for Authentication, Authorization and Accounting.
Authentication protocols: It supports various authentication protocols, including PAP, MS-CHAP, EAP-MD5, PEAP, EAP-FAST, EAP-TLS.
Access control: Cisco ISE provides us with a wide range of access control mechanisms, such as URL Redirect, Vlan Assignment, downloadable access control lists (dACL) and SGA tagging
Posture: Cisco ISE uses NAC-client-Agent or web agent. Checks devices that connect to the network. A network administrator can determine various conditions to check, such as antivirus, operating system status, etc.
Profiling : ProfilingIt is used to identify and analyze network devices. These devices can be any type of device that wants to access the network, such as iPhone, iPad, laptop, printers, etc. By default, ISE has several Profiling for these devices. Also, we can create our desired Profiling and consider certain policies for it.
Policy model : Policy model makes it possible to have more flexible access control using features and roles.
Guest lifecycle management: With this feature, we can have a user with special access in ISE and use it to control guest users.
Platform options:ISE can be used on two platforms. The first platform can be used as a connected device and the second platform can be used as a virtual device. ISE can be installed on VMware and other Cloud Platforms.
Monitoring, Troubleshooting and Reporting: In ISE, monitoring, troubleshooting and reporting are done simply and with a user-friendly environment
Now have TACACS+ – There are a few prerequisites in utilizing TACACS+ (ISE Device Management):
- User groups can exist within ISE or in another external source (e.g. Active Directory).
- Device Management with ISE requires that devices support TACACS+. You can utilize RADIUS and still take advantage of visibility and policies with ISE for devices that do not support TACACS+, but devices using RADIUS will consume a Base/Essentials license.
- Each Policy Service Node (PSN) requires a Device Administration license.
ISE deployment Terminology –
| Term | Definition |
|---|---|
| Service | A specific feature that a persona provides such as network access, profiling, posture, security group access, monitoring, and troubleshooting. |
| Node | An individual physical or virtual Cisco ISE appliance. |
| Node Type | The Cisco ISE node can assume any of the following personas: Administration, Policy Service, Monitoring |
| Persona | Determines the services provided by a node. A Cisco ISE node can assume any or all of the following personas: The menu options that are available through the administrative user interface depend on the role and personas that a node assumes. |
| Role | Determines if a node is a standalone, primary, or secondary node and applies only to Administration and Monitoring nodes. |
More information can be found here for deployment modes :
For Lab, I am deployment evaluation and small node on ESXi as VM.
| OVA Template Type | Number of CPUs | CPU Reservation (In MHz) | Memory (In GB) | Memory Reservation (In GB) |
|---|---|---|---|---|
| Evaluation | 4 | No reservation. | 16 | No reservation. |
Make sure you meet the I/O performance (so I prefer to have SSD for ISE deployment for a better outcome).
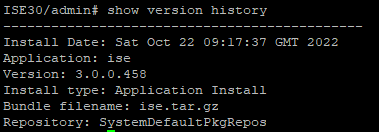
Download OVA from the cisco software download site: ISE-3.0.0.458-virtual-SNS3615-SNS3655-300.ova
I am using vSphere to directly Add OVA so it will be easy to install. (OVA will automatically take the resource, just follow easy installation steps as guided).
OVA import and create as VM take 20-30min depending on compute you have.
As soon as you see this on console you are good to go to setup ISE 3.0

you need just simple information
- IP address
- Domain name
- DNS
- Time Zone ( for distributed deployment always use UTC.
- NTP.
Installation starts, take 30-60minutes again depending on computing resources.
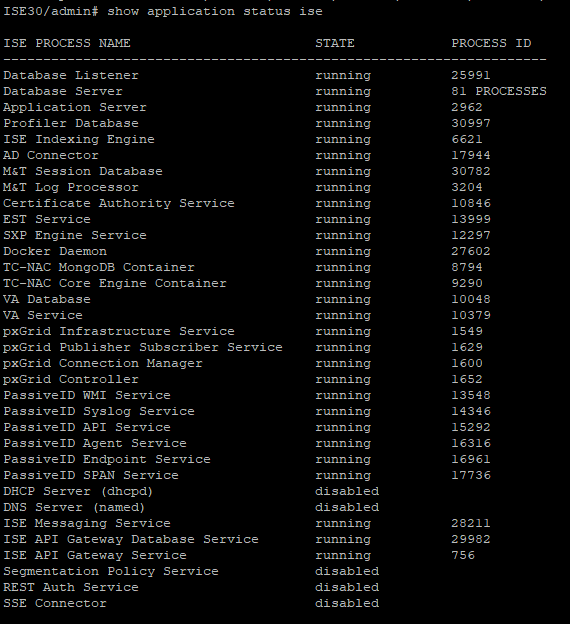
As soon it finishes, you get a login prompt, which means the ISE installation is done. (before login to GUI, make sure all applications running as expected.)
# show application status ise
Time to login in GUI and start working basic config :
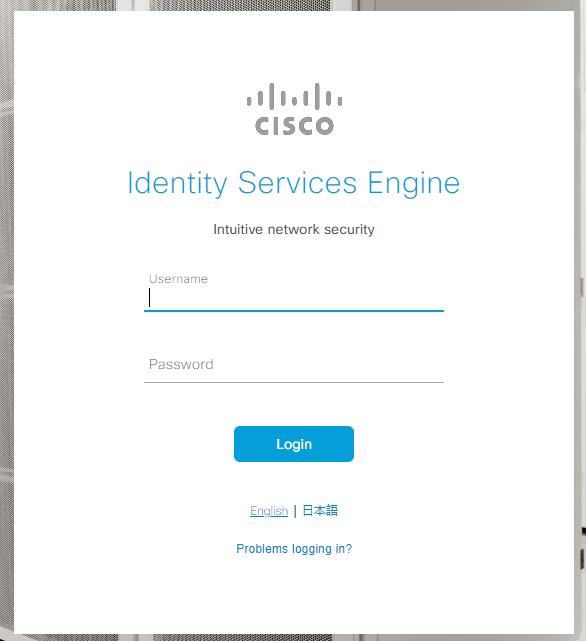
ISE Installation is made easy, and GUI has a better experience compared to the old version 1.2/1.4/2.X
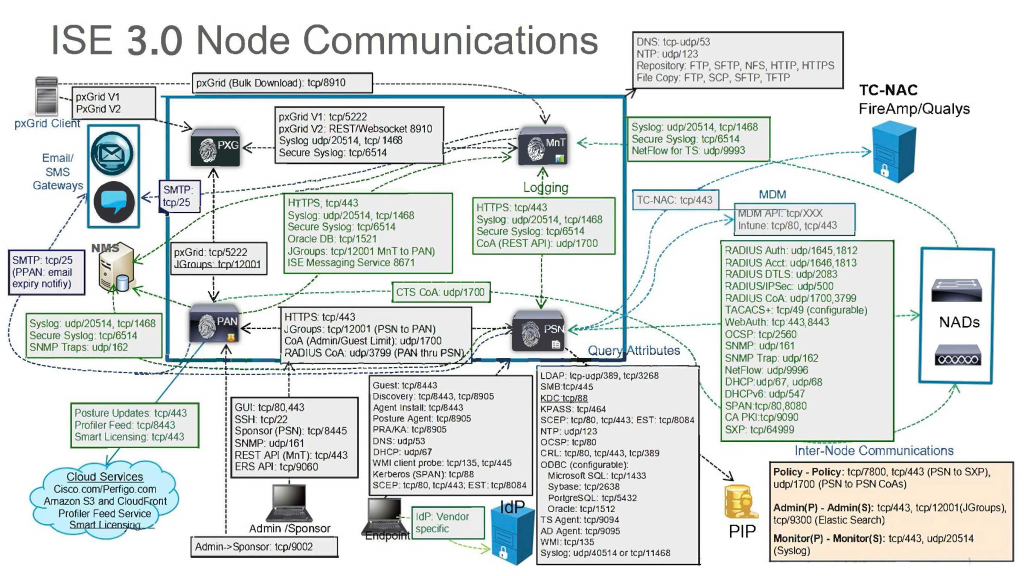
Good reference on how ISE interacts with other components and common ports used :
config and some lab will follow soon…!
Happy Labbing …!!!!